Wie man sein Golf-Handicap berechnet und verbessert
Golf kann für Neulinge ein einschüchterndes Spiel sein, und das Konzept eines Handicap klingt oft wie geheimnisvolle Mathematik, die man besser den Experten überlässt. Aber keine Sorge – ein Golf-Handicap ist einfach eine Möglichkeit, dein Spielniveau zu messen, und jeder – ja, wirklich jeder! – kann eins bekommen.
In diesem Leitfaden erklären wir, wie Handicaps funktionieren und wie du deins berechnest. Anschließend zeigen wir Möglichkeiten, dein Handicap zu verbessern – inklusive der spannenden Welt des virtuellen Golfens und hochmoderner Launch-Monitore.
Egal, ob du völlige(r) Anfänger(in) bist oder anstrebst, ein Spieler mit niedrigem Handicap zu werden – hier findest du Tipps, Technik und Übungen, um dein Spiel auf das nächste Level zu bringen. Legen wir los …
Golf-Handicaps verstehen
Stell dir vor, du spielst Golf mit Freundinnen und Freunden unterschiedlicher Spielstärke – wie könnt ihr fair gegeneinander antreten, wenn die eine Person chippt wie ein junger Tiger Woods, während die andere den Ball kaum trifft? Genau dafür gibt es das Handicap-System. Ein Golf-Handicap ist eine Zahl, die die Spielstärke eines Golfers oder einer Golferin widerspiegelt und es Spielerinnen und Spielern aller Leistungsniveaus ermöglicht, auf Augenhöhe zu konkurrieren. Je niedriger dein Handicap, desto besser bist du (ein Scratch-Golfer hat ein Handicap von 0, was bedeutet, dass er/sie auf jedem Platz Par spielen kann). Ein höheres Handicap bedeutet, dass du in der Regel mehr Schläge über Par benötigst.
Handicaps sorgen nicht nur für faire Bedingungen, sondern verfolgen auch deinen persönlichen Fortschritt. Wenn dein Handicap von 30 auf 20 sinkt, bedeutet das, dass du große Schritte gemacht hast. Das Tolle ist, dass Handicaps weltweit offiziell im Rahmen des 2020 eingeführten World Handicap System (WHS) anerkannt sind – das heißt, dein Handicap-Index ist unabhängig davon vergleichbar, wo du spielst.
Einige wichtige Begriffe …
Um Handicaps zu verstehen, hören Sie Begriffe wie Kursbewertung and Slope Rating. Dies sind lediglich Zahlen, die die Golfbehörden jedem Platz zuweisen, um den Schwierigkeitsgrad anzuzeigen. Course Rating ist, wie viele Schläge ein Kratzer (0 Handicap) Golfer sollte auf diesem Platz spielen, und der Slope Rating misst, wie viel schwieriger der Platz für einen Bogey-Golfer (etwa 18–20 Handicap) im Vergleich zu einem Scratch-Golfer ist. Diese Bewertungen helfen dabei, dein Handicap für einen bestimmten Platz zu berechnen (dein Course Handicap). Die gute Nachricht? Diese Werte sind bereits für dich vorkalkuliert, sodass du während einer Sonntagsrunde keine komplizierte Mathematik auf der Scorekarte machen musst.
So erhalten Sie Ihr Handicap (WHS, Schritt für Schritt)
Einrichten Treten Sie einem Golfclub oder dem Programm Ihres nationalen Verbands bei (z. B. iGolf in England), damit Ihre Ergebnisse in das World Handicap System (WHS) einfließen.
Hol dir die App: Laden Sie Ihre offizielle Handicap-App herunter (z. B. MyEG), melden Sie sich an und aktivieren Sie bei Aufforderung die Standort-/Club-Berechtigungen.
Wählen Sie Ihre T-Shirts: Wählen Sie einen bewerteten Platz und ein Tee-Set aus (sie haben eine Course Rating und Slope Rating, die in der App angezeigt werden).
Vorab registrieren: Bevor du abschlägst, starte eine Scorekarte in der App und füge einen Marker hinzu, um deinen Score zu verifizieren.
Nach den Regeln spielen: 9 oder 18 Löcher zählen beide. Bleib ehrlich und spiele Putts zu Ende, sofern das Format nichts anderes vorgibt.
Posten Sie Ihre Punktzahl noch am selben Tag: Geben Sie, wenn möglich, Loch für Loch ein; Ihr Zähler bestätigt dies in der App. Keine Tabellenkalkulationen erforderlich — die App übernimmt die Berechnungen.
Hinter den Kulissen: WHS erstellt für diese Runde eine Score-Differenz, angepasst an Course Rating, Slope und den PCC (Playing Conditions) des Tages.
Erstes Handicap: Nach 54 Löchern mit zählbaren Ergebnissen (beliebige Mischung aus 9er- und 18er-Runden) erhältst du deinen anfänglichen Handicap-Index.
Wie es aktualisiert wird: Sobald du 20 Ergebnisse hast, wird dein Index zum Durchschnitt deiner besten 8 jüngsten Differenzen und aktualisiert sich nach jeder Runde.
Am Tag, an dem du spielst: Ihre App wandelt den Index für diese Abschläge automatisch in die Course Handicap um. Bei Wettspielen kann anschließend ein Vorgabenausgleich angewendet werden, um Ihre Playing Handicap zu erhalten.
Aktuell halten Protokolliere jede Runde, die du kannst. Mehr Ergebnisse = ein genauerer Index, bessere Ziele und ein klareres Bild deines Fortschritts.
So ermittelst du dein Handicap (WHS einfach erklärt)
Ihr Handicap-Index
Das WHS führt eine laufende Aufzeichnung deiner Ergebnisse und setzt deinen Handicap-Index aus dem Durchschnitt deiner besten 8 Differentials aus deinen letzten 20 Runden fest. Es aktualisiert sich, während du spielst, sodass es deine aktuelle Leistungsfähigkeit widerspiegelt – nicht einen lebenslangen Durchschnitt.
Was ist eine Punktedifferenz?
Nachdem du eine Score eingereicht hast, erstellt das System eine Score-Differenz, die deinen Bruttoscore an die Schwierigkeit des Platzes (Course Rating und Slope) und, wenn zutreffend, an die tägliche Playing Conditions Calculation (PCC) anpasst. Keine Algebra nötig – die App übernimmt die Mathematik –, aber so bleibt es von einem Platz und Tag zum nächsten fair.
Course Handicap (die Schläge, die du heute bekommst)
Ihr Handicap-Index ist universell, aber die Schläge, die Sie erhalten, hängen davon ab, wo Sie spielen. Für Ihr Tee-Set wird das Course Handicap aus Ihrem Handicap-Index, dem Slope Rating der Abschläge und dem Course Rating minus Par berechnet. Kurz gesagt: schwierigere Abschläge, mehr Schläge; freundlichere Abschläge, weniger. Ihr Clubaushang oder Ihre App rechnet das automatisch für Sie um.
Ganz neu bei Handicaps?
Sie können einen vorläufigen Handicap-Index erhalten, nachdem Sie 54 Löcher mit akzeptablen Ergebnissen auf bewerteten Plätzen gespielt haben (eine beliebige Mischung aus 9- und 18-Loch-Runden) – praktisch, wenn Sie gerade anfangen oder kein Clubmitglied sind. Von da an kann jede neue Runde Ihren Index ein wenig nach oben oder unten bewegen. Zuzusehen, wie diese Zahl fällt, während sich Ihr Training auszahlt, ist die halbe Freude.
Warum es wichtig ist, dein Handicap zu senken
Warum ist es uns wichtig, dein Handicap zu senken? Nun, abgesehen von den Prahlereien am 19. Loch eröffnet ein niedrigeres Handicap eine ganz neue Welt im Golf:
Fairer Wettbewerb: Mit einem niedrigeren Handicap wirst du feststellen, dass du in einer größeren Bandbreite von Veranstaltungen mithalten oder sogar konkurrenzfähig sein kannst. Einige Amateurturniere haben Handicap-Grenzen, daher kann die Verbesserung deines Handicaps dich für mehr Wettbewerbe qualifizieren.
Persönliche Leistung: Am Ende des Tages ist Golf ein Spiel gegen dich selbst. Zu sehen, wie dein Handicap von, sagen wir, 28 auf 18 fällt, ist ein konkreter Beweis dafür, dass du ein besserer Golfer bist als zuvor. Es ist enorm motivierend und lohnend, kontinuierlich in die richtige Richtung Fortschritte zu machen.
Konsistenz und Selbstvertrauen: Ein fallendes Handicap bedeutet, dass du konstanter wirst. Du eliminierst diese Zusammenbruch-Löcher und schlechten Runden. Diese Konstanz erzeugt dann Selbstvertrauen. Es ist keine Überraschung: Wenn du auf das Tee gehst wissend Wenn du normalerweise Anfang 80 spielst (statt nur zu hoffen, dich nicht zu blamieren), wirkt das Wunder für dein mentales Spiel.
Ambitionierte Ziele: Viele Golfer sehen Handicaps als Meilensteine, die es zu erreichen gilt. Zum ersten Mal die 100 zu knacken (Handicap ~28), die 90 zu knacken (Handicap ~18), die 80 zu knacken (Handicap ~10) oder sogar einstellig zu werden. Das Verfolgen dieser Ziele gibt deinem Training und Spiel einen Sinn. Es geht nie nur um eine einzige Runde, sondern um eine Reise der Verbesserung.
Dein Handicap zu senken ist ein Marathon, kein Sprint. Je besser du wirst, desto schwerer ist jeder weitere Schlag weniger auf dem Handicap (von 30 auf 20 zu kommen ist einfacher als von 10 auf 0). Es wird Zeit brauchen – und das ist okay. Die Reise ist doch Teil des Spaßes, oder? Jede Trainingseinheit, jedes neue Gadget, jeder Tipp von deinem Coach ist ein Puzzleteil, um einen weiteren Schlag abzuziehen.
Apropos neuer Gadgets …
Lassen Sie uns über die neueste Methode sprechen, mit der Golfer ihren Handicap‑Fortschritt rasant verbessern: Mit virtuellem Golf und Abschussmonitore.
Vom Driving Range zum virtuellen Golf: Der moderne Weg zur Verbesserung
Noch vor nicht allzu langer Zeit bedeutete Golf üben, auf der Driving Range Bälle zu schlagen und das Beste zu hoffen. Das Feedback beschränkte sich auf fühlen und beobachteten, wohin der Ball flog. Wenn man nicht einen Trainer an seiner Seite hatte, war es tatsächlich sehr schwierig zu verstehen, was richtig lief und was schiefging.
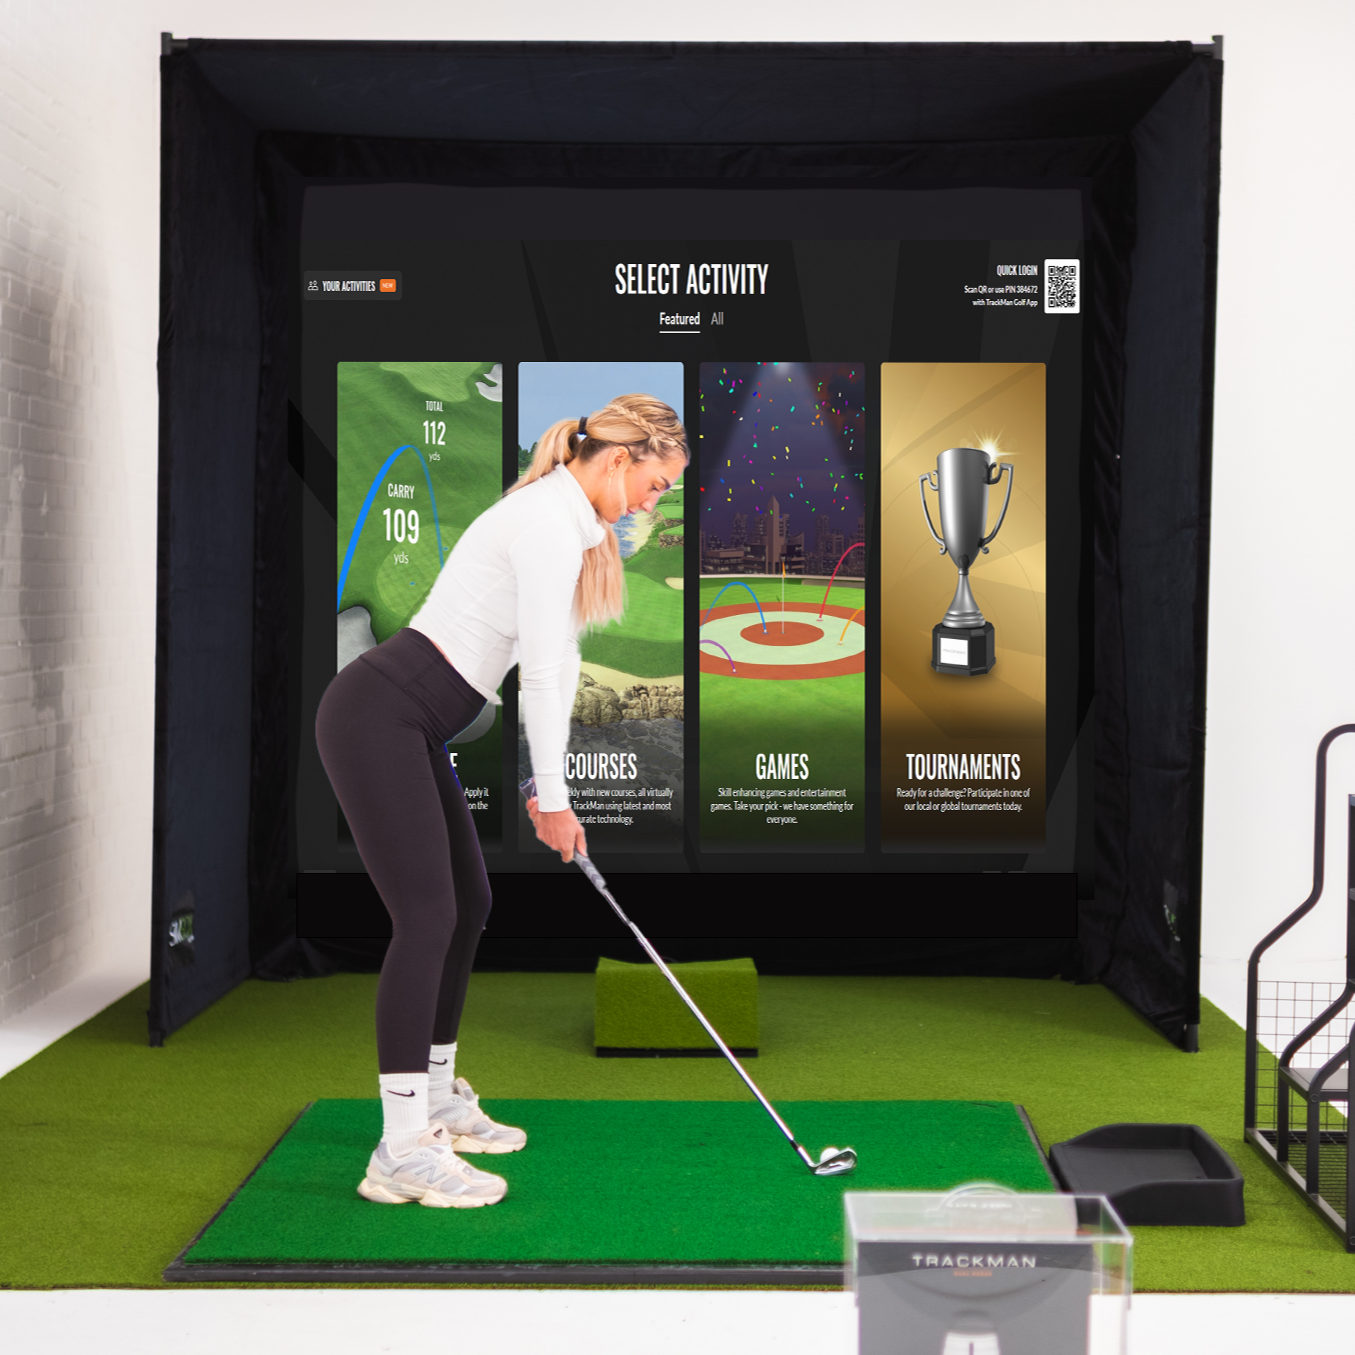
Heute ist alles anders. Wir leben im Zeitalter von virtuellem Golf und High-Tech-Launch-Monitoren – Geräte, die deine Schläge mit erstaunlicher Präzision messen und dir sogar ermöglichen, simulierte Runden in deiner Garage oder deinem Gartenschuppen zu spielen. Diese technologische Revolution ist nicht nur etwas für Profis mit schicken Sponsoren; sie wird für alltägliche Golfer immer zugänglicher. Und sie zu nutzen kann für dein Handicap ein echter Gamechanger sein.
Fangen wir also mit der großen Frage an: Was ist ein Launch-Monitor? Im Grunde ist es ein kleines Radar-/Kamerasystem, das neben dir steht, während du einen Ball schlägst. Es erfasst eine Fülle von Daten: Ballgeschwindigkeit, Abflugwinkel, Spinrate, Carry-Distanz, Schlägerkopfgeschwindigkeit, Schlägerpfad und vieles mehr. Mit anderen Worten: Es ist, als hätte man einen äußerst genauen Golfwissenschaftler, der jeden Schlag beobachtet und dir einen Bericht über die Flugbahn von Schlagfläche und Ball liefert. Einige Launch-Monitore sind auch Golf-Simulatoren – sie zeigen deinen Schlag auf einem virtuellen Platz und lassen dich Spiele oder Runden spielen.
Stellen Sie sich vor, Sie holen die Driving Range und den Golfplatz zu sich nach Hause – mit sofortigem Feedback bei jedem Schwung.
Es ist wichtig zu beachten, dass ein Launch-Monitor selbst nicht dein offizielles Handicap berechnet – du bekommst nicht plötzlich einen Handicap-Index, nur weil du Drives in ein Netz hämmerst. Handicaps basieren auf echten Platzrunden-Ergebnissen. Aber ein Launch-Monitor kann dir helfen, die zugrunde liegenden Fähigkeiten zu verbessern, die zu niedrigeren Scores führen und damit zu einem besseren Handicap. Betrachte ihn als ein Werkzeug für Übung und Feedback, kein Selbstzweck. Launch-Monitore können Ihnen durch smarteres Training zu einem niedrigeren Handicap verhelfen.
Vier Gründe, warum ein Launch Monitor dein Handicap senken wird
Präzise Daten & Schussanalyse: Launch-Monitore zeigen dir genau, was jeder Schlag macht. Anstatt zu raten, warum dein Ball einen Slice hat, siehst du Daten wie Spinachse und Schlägerblattwinkel beim Treffmoment, die klar aufzeigen, was dein Schwung macht. Deine Zahlen zu kennen, nimmt das Rätselraten bei Fehlschlägen weg – du kannst identifizieren spezifisch Probleme erkennen und daran arbeiten, sie zu beheben.
Fokussiertes, effizientes Üben: Mit einem Launch-Monitor hat jeder Übungsball einen Zweck. Du schlägst nicht einfach gedankenlos Bälle – du arbeitest auf ein Ziel hin und siehst Fortschritte in Echtzeit. Statt zwei Stunden lang eine schlechte Gewohnheit zu wiederholen, können dir 30 Minuten mit Feedback helfen, eine gute zu entwickeln. Training mit dem Launch-Monitor setzt auf Qualität statt Quantität.
Virtuelles Spiel & Spaß-Challenges: Einige der neuesten Launch-Monitore kommen mit virtuellen Golfplätzen und Minispielen. Das hält dein Training unterhaltsam und abwechslungsreich und fügt entspannteren Einheiten Elemente von Können hinzu. In einer Session spielst du vielleicht St Andrews auf deinem Simulator, in der nächsten machst du einen Nearest-to-the-Pin-Wettbewerb. Diese Gamification sorgt dafür, dass du mehr trainierst, weil es sich nicht wie harte Arbeit anfühlt. Und je zielgerichteter du übst, desto besser wirst du – so einfach ist das.
Feedback und Anpassung in Echtzeit: Die sofortige Rückmeldung, die ein Launch-Monitor liefert, ist unglaublich hilfreich beim Lernen. Schlag ausführen, Ergebnisse sehen, etwas anpassen und sofort erkennen, ob es funktioniert hat. Es ist, als hättest du einen Coach dabei, der jeden Schwung beobachtet. Statt eine schlechte Technik wochenlang einzuprägen, bis dich dein Coach das nächste Mal sieht, kannst du sie nach wenigen Schwüngen erkennen und innerhalb von Minuten den Kurs korrigieren.
Kurz gesagt ermöglichen Launch-Monitore datengestütztes, zielgerichtetes Training. Sie machen aus dem Rätselraten bei Verbesserungen eine Wissenschaft. Von ` to Rapsodo, die besten Geräte präsentieren die Daten mit visuellen Diagrammen und farbcodiertem Feedback, sodass sich Erkenntnisse leicht verstehen und umsetzen lassen.
Lernen Sie Ihre virtuellen Coaches kennen: Die besten Golf-Launch-Monitore zur Spielverbesserung
Der Markt ist voll von Golftechnik, aber in diesem Beitrag konzentrieren wir uns auf drei herausragende Launch-Monitore, die dein Training auf das nächste Level heben können: der Garmin Approach R50, der Rapsodo MLM2PRO und der Uneekor EYE MINI LITE.
Jedes hat seine eigene Persönlichkeit, seine Funktionen und den idealen Nutzer. Wir erklären, was sie tun, wie sie helfen und für wen sie am besten geeignet sind. Denk daran: All das sind Werkzeuge, die dir mit besserem Training helfen, deine Scores zu senken – das Ziel ist immer noch, rauszugehen und auf dem echten Platz niedriger zu spielen.
Garmin Approach R50 – Der Premium-All-in-One-Simulator
Der Approach R50 Launch-Monitor von Garmin kombiniert einen integrierten Touchscreen und ein Triple-Kamerasystem für ein nahtloses Heim-Simulatorerlebnis.
Wenn Tony Stark einen Golfsimulator entwerfen würde, sähe er wahrscheinlich aus wie der Garmin R50. Das ist ein Premium-Launch-Monitor und Golfsimulator in einem, komplett mit einem eigenen 10‑Zoll-Farb-Touchscreen. Das Gerät selbst zeigt deine Daten und sogar den simulierten Kurs an! Es ist wirklich eine Plug-and-Play-Lösung: Einschalten und du kannst eine virtuelle Runde auf über 43.000 Plätzen spielen (Home Tee Hero erfordert eine aktive Garmin Golf-Mitgliedschaft) oder ohne zusätzlichen Aufwand auf die Driving Range gehen.
Unter der Haube verwendet der R50 drei Hochgeschwindigkeitskameras, um präzise Schläger- und Balldaten zu erfassen – von Ballgeschwindigkeit und Abflugwinkel bis hin zu Spin-Rate, Spinachse und mehr. Er misst zudem Schlägerkennwerte wie Schlägerkopfgeschwindigkeit und Schlägerwinkel (wie Eintreffwinkel und Schlagflächenwinkel) und liefert dir so auf dem schönen Touchscreen Sekunden nach dem Schlag ein vollständiges Bild deines Schwungs.
Aber wir wissen, was du denkst: Was ist mit meinem Handicap? Der R50 bietet einen Trainingsmodus, der Statistiken für jeden Schläger erfasst und deine Schläge in einem Streudiagramm darstellt, um zu zeigen, wie sich deine Konstanz schlägt. Das Training mit solchen Visualisierungen macht schnell deutlich, wenn deine Schläge beispielsweise häufig links vorbeigehen oder wenn deine Distanzkontrolle unregelmäßig ist. Der R50 kann außerdem den Treffmoment aufzeichnen Videos, die einen Clip deines Schlägers beim Balltreffmoment zusammen mit den Zahlen wiedergeben. Das ist Gold für die Spielverbesserung – du kannst tatsächlich sehen, was die Schlagfläche deines Schlägers beim Impact gemacht hat, als du diesen fiesen Hook geschlagen hast, statt dir nur den Kopf zu kratzen und dich zu fragen, was passiert ist.
Ein weiterer großer Pluspunkt: Der R50 beherrscht in der Simulation auch Putten und Chippen. Das bedeutet, Sie können Druck-Putts aus 6 Fuß üben und vollständig in virtuelle Runden eintauchen. Das Ergebnis ist ein Setup, mit dem Sie nicht nur Ihre Schwungmechanik, sondern auch Platzmanagement und Schlagwahl trainieren können. Es kommt dem echten Golf so nahe wie möglich.
Wir würden den Garmin R50 an engagierte Golfer und technikaffine Anfänger richten, die einen kompromisslosen Simulator wollen. Wenn Budget und Platz vorhanden sind, kann der R50 Ihr ultimatives Golf‑Labor für zu Hause sein und Sie von der Schwungmechanik bis zur Performance auf dem Grün begleiten.
Rapsodo MLM2PRO – Dein Schwung in High Definition
Der Rapsodo MLM2PRO Launch Monitor nutzt zwei Kameras und Radar, um gemessene Spin-Daten und Swing-Wiederholungen aus mehreren Blickwinkeln bereitzustellen und so jedes Training in eine Hightech-Trainingseinheit zu verwandeln.
Wenn du zu den Golfern gehörst, die gerne Schwungvideos analysieren und Daten auswerten, ist der Rapsodo MLM2PRO könnte dein neuer bester Freund sein.
Dieser Launch-Monitor kombiniert Doppler-Radar mit zwei fortschrittliche Kameras in das Gerät integriert – das bedeutet, es misst nicht nur Ihre Schläge mit Präzision, sondern erfasst auch Ihren Schwung in Echtzeit aus mehreren Blickwinkeln. Im Grunde ist es ein Launch-Monitor + Videostudio + Simulator – alles in einem schlanken, tragbaren Gerät vereint.
Sprechen wir zuerst über diese Kameras. Wenn du mit dem MLM2PRO einen Schlag machst, kann das Gerät deinen Schwung aus zwei Blickwinkel gleichzeitig: typischerweise eine Ansicht entlang der Linie (in Richtung Ihres Ziels) und eine frontale Ansicht. Anschließend bietet es Mehrwinkel-Schwung-Wiederholung, beide Ansichten nebeneinander synchronisieren und gleichzeitig eine Zeitlupen-Nahaufnahme des Aufpralls anzeigen. Das ist ein absoluter Goldschatz für Verbesserungen. Du kannst deine Schwungmechanik Bild für Bild analysieren und sie mit dem Schlagresultat vergleichen.
Auf der Datenseite ist das Rapsodo MLM2PRO bestens ausgestattet. Es liefert 15 verschiedene Metriken für jeden Schlag, davon werden 8 direkt gemessen und der Rest berechnet. Dazu gehören Essentials wie Ballgeschwindigkeit, Abflugwinkel, Startrichtung, Carry- und Gesamtdistanz sowie fortgeschrittene Kennzahlen wie Club Path, Angle of Attack, Spin Rate und Spin Axis. Was Rapsodo auszeichnet, ist die Fähigkeit, die Spin Rate und die Spin Axis direkt zu messen – diese sind ohne Hochgeschwindigkeitskameras normalerweise schwer zu erfassen. Rapsodo erreicht das mithilfe spezieller Golfbälle mit Rapsodo Precision Technology-Markierungen. Mit diesen Bällen kann das MLM2PRO den Spin deines Balls mit beeindruckender Genauigkeit messen. Übersetzung: Du erhältst Einblicke auf Profiniveau in die exakte Rotation deines Balls – entscheidend, um die Flugkurve und Stoppwirkung zu verstehen.
Der MLM2PRO ist nicht nur ein Traum für Daten-Nerds; er ist darauf ausgelegt, Training angenehm und zielorientiert zu machen. Er bietet einen Rapsodo Combine – einen spielerisch gestalteten Übungstest, bei dem du auf verschiedene Ziele schlägst und für deine Leistung Punkte erhältst. So kannst du deine Fähigkeiten benchmarken und Schwachstellen identifizieren. Außerdem gibt es einen Target Range-Modus mit 72 verschiedenen Zielentfernungen und Fairway-Szenarien – perfekt, um diese Zwischen-Distanzen oder Druck-Drives zu üben. Und wenn es Zeit für Spaß oder Abwechslung ist, glänzt der MLM2PRO mit Simulation: Er bietet 30,000+ Courses zum Spielen (mit einer Premium-Mitgliedschaft) und hat sogar Integrationen mit erstklassiger Simulator-Software wie E6 Connect, GSPro und Awesome Golf. Du kannst den Rapsodo im Grunde mit deinem PC oder iPad nutzen, um ein komplettes Home-Simulator-Setup zu erstellen, oder bei der mobilen Erfahrung bleiben – er ist flexibel.
Für die Spielverbesserung sind die Vorteile des Rapsodo MLM2PRO klar. Sie erhalten sofortiges, detailliertes Feedback sowohl zu den Ursache (dein Schwung) und Wirkung (Ballflug). Es ist, als hättest du gleichzeitig einen Launch-Monitor und ein Highspeed-Kamerateam, das sich auf deinen Schwung konzentriert. Durch das Überprüfen deiner Schwünge kannst du präzise Anpassungen vornehmen. Zum Beispiel könntest du daran arbeiten, deinen Schwung flacher zu machen, wenn du siehst, dass ein steiler Eintreffwinkel zu hohen Backspin-Ballons führt. Oder du passt deinen Griff an, wenn das Video zeigt, dass er beim Impact offen ist, und bringst das in Einklang mit dem Fade, den du in den Daten immer wieder siehst.
Rapsodo enthält außerdem ein R-Speed Trainingsmodus, wodurch Sie ein Schwunggeschwindigkeitstraining durchführen können, ohne einen Ball zu schlagen. Sie können einfach Geschwindigkeitsschwünge machen, und es misst Ihre Schwunggeschwindigkeit. Für Spieler, die mehr Länge gewinnen möchten (wer nicht?), hilft dies, sicher an der Geschwindigkeit zu arbeiten und den Fortschritt zu verfolgen.
Alles in allem ist das MLM2PRO ein zukunftsorientiertes Gerät, das regulären Golfern ein Übungserlebnis wie auf Tour-Niveau bietet. Es wird dich mit Daten und Video antreiben, packt das Ganze aber in eine spaßige, wettbewerbsorientierte Plattform. Wenn du es ernst meinst mit dem Reduzieren deiner Schläge und es liebst, deinen Schwung zu analysieren, liefert Rapsodo einen beinahe obsessiven Detailgrad, der deinen inneren Schwung-Nerd zufriedenstellt. Umarme die Daten – und sieh zu, wie deine Handicap-Zahlen fallen!
Uneekor EYE MINI LITE – Präzision auf Profiniveau für zu Hause
Wenn Sie der Typ Golfer sind, der das höchste Genauigkeit und nimmt ein bisschen zusätzlichen Aufwand bei der Einrichtung in Kauf, die Uneekor EYE MINI LITE ist eine ausgezeichnete Wahl. Uneekor ist bekannt für seine Simulatoren in Profiqualität (deren Overhead-Kamerasysteme werden weltweit in Lehrstudios und Fitting-Bereichen eingesetzt). Der EYE MINI LITE ist im Wesentlichen Uneekors Versuch, diese Präzision auf Tour-Niveau in ein kleineres, zugänglicheres Gerät zu packen. Es ist ein Launch-Monitor für ernsthafte Golfer, die erstklassige Daten vor allem anderen.
Die EYE MINI LITE verwendet eine photometrisches System mit zwei Kameras – im Grunde zwei superhochgeschwindigkeitsfähige Kameras – um Schläger und Ball beim Aufprall mit unglaublicher Detailgenauigkeit zu erfassen. Es misst 19 verschiedene Kennzahlen (Ball- und Schlägerdaten) und fast alle von ihnen sind direkt gemessen eher als berechnet. Mit anderen Worten, diese Einheit ist sehen Ihren Aufprall in Hochgeschwindigkeitsbildern erfassen und berichten, was tatsächlich passiert ist, ohne sich auf Algorithmen zu verlassen, um Lücken zu füllen. Das Ergebnis ist eine Genauigkeit, die mit den Besten der Branche mithalten kann.
Nun deutet das „LITE“ im Namen darauf hin, was anders ist: Um dieses Gerät erschwinglicher zu machen, hat Uneekor einige Komfortfunktionen weggelassen. Das Eye Mini Lite hat keinen Akku – es wird über das Stromnetz betrieben – und hat keinen eigenen Bildschirm. Es ist für eine feste Indoor-Installation gedacht, bei der es über eine Ethernet-zu-USB-Verbindung mit einem Gaming-PC verbunden wird. Man kann es nicht einfach in die Golftasche werfen für eine schnelle Session auf der Range, und es ist ausschließlich für die Nutzung in Innenräumen konzipiert.
Alles läuft über Uneekors Windows-basierte Software auf Ihrem PC. Im Grunde tauscht das Eye Mini Lite Portabilität und Spielereien gegen pure Leistung und Wert. Du bezahlst für die Optik und Sensoren, nicht für Extras.
Wie hilft das Eye Mini Lite, Ihr Spiel zu verbessern? Indem es als extrem Präzises Mikroskop für deinen Schwung und Ballflug. Es erfasst Dinge, die manchen anderen Monitoren entgehen könnten. Zum Beispiel verwendet Uneekor Zielmarken-Aufkleber für Schlägerblatt um den Kameras zu helfen, die Schlägerfläche während des Treffmoments zu verfolgen. Dies liefert ultragenaue Daten zur Schlägerausrichtung – Schlagflächenwinkel, Loft, Lie – sowie wo im Gesicht du triffst den Ball. Zu wissen, ob du ihn mit der Spitze oder mittig triffst, kann Unterschiede bei Abflug und Spin erklären. Die meisten Hobbygolfer merken nicht, wie stark außermittige Treffer die Distanz beeinflussen; dieses Gerät macht das glasklar – der erste Schritt, um die Konstanz zu verbessern.
Das Feedback ist unmittelbar – Sie schlagen den Ball, und Ihre Daten sowie die Schlagsimulation erscheinen sofort auf dem Bildschirm. Es gibt nahezu keine Verzögerung, sodass es sich sehr natürlich und direkt mit Ihrem Schwung verbunden anfühlt. Mit dem Eye Mini Lite können Sie mühelos in einen Rhythmus kommen: schlagen, Ergebnisse sehen, anpassen, erneut schlagen – nahtlos.
Die Software von Uneekor bietet Ihnen eine Driving-Range mit allen Zahlen sowie verschiedene Trainingsmodi. Und wenn Sie eine vollständige Platzspiel-Simulation möchten, ist das Gerät mit beliebter Drittanbieter-Software wie E6, TGC 2019 und GSPro kompatibel.
Mit der hervorragenden View-Software von Uneekor erhalten Sie Einblicke in all Ihre Daten, 3D-Ballflug und können sogar die Kollision des Schlägers mit dem Ball sehen. Für die meisten Golfer reicht das aus, um deutliche Verbesserungen zu erzielen. Sie können schrittweise an Schwungänderungen arbeiten und sofort sehen, ob sich die Werte in die richtige Richtung entwickeln.
Um es klar zu sagen: Für Einsteiger ist das Eye Mini Lite wahrscheinlich überdimensioniert – und die Einrichtung kann sich etwas technisch anfühlen. Für ambitionierte Golfer, die ein Heim-Setup wollen, das in Richtung Profi-Niveau geht, ist es jedoch eine fantastische Option zu einem relativ vernünftigen Preis. Es verzichtet auf Schnickschnack und konzentriert sich auf das, was Handicaps senkt: präzise, umsetzbare Daten. Wenn du datengetrieben und übungsfokussiert bist, wird das Eye Mini Lite der kompromisslose Mentor sein, der dich ehrlich hält und deine Verbesserung beschleunigt.
Übungstipps für jedes Handicap-Niveau
Nachdem wir die Technologie vorgestellt haben, die in Bereitschaft ist, um Ihnen zu helfen, kommen wir zur Strategie: Wie übt man mit diesen Launch-Monitoren, um das Handicap zu senken?
Es reicht nicht aus, nur Zahlen zu sammeln oder zum Spaß Simulator-Golf zu spielen – du musst mit Zielsetzung trainieren. Hier sind einige maßgeschneiderte Tipps für verschiedene Spielstärken, zusammen mit Übungen, häufigen Fehlern und Möglichkeiten, dein Training mithilfe von Launch-Monitoren zu personalisieren.
Für Anfänger und Spieler mit hohem Handicap (Handicap 20+)
Halte es einfach und mit Spaß
Wenn du neu im Spiel bist, ist Konstanz die größte Hürde. Konzentriere dich darauf, soliden Kontakt herzustellen und den Ball sauber zu treffen. Genau hier kann ein Launch-Monitor bei den Grundlagen helfen.
Beginnen Sie mit einer Range-Session im Übungsmodus Ihres Geräts und konzentrieren Sie sich zunächst nur auf ein oder zwei Metriken. Carry-Distanz und Abflugwinkel sind ein guter Anfang.
Nutzen Sie visuelle Elemente zu Ihrem Vorteil
Viele Anfänger slicen den Ball. Wenn das bei dir der Fall ist, zeigt der Monitor eine starke Links-nach-Rechts-Spinachse oder Sidespin an. Ein Gerät wie das R10 oder Rapsodo zeigt sogar Flugkurven an – nutze dieses Feedback! Probiere eine Übung, bei der du bewusst einen Draw-Schwung übertreibst (für Rechtshänder: Fühle, als würdest du nach rechts ins Außenfeld schwingen) und beobachte am Monitor, ob sich die Spinachse weniger nach rechts neigt. Auch wenn du es nicht über Nacht behebst, beginnst du, die fühlen einer Schwungänderung mit einem sichtbare Veränderung im Ballflug. Das ist enorm fürs Lernen.
Mach aus Üben ein Spiel
Es ist schwer, motiviert zu bleiben, wenn man den ganzen Tag nur Bälle schlägt. Entdecke die spaßige Seite deiner Technik mit Zielmodus oder Range-Spiele. Stellen Sie ein Ziel in 100 yards ein und schlagen Sie 10 Schläge – sehen Sie, wie viele innerhalb eines bestimmten Radius landen. Geräte wie das MLM2PRO haben 72 verschiedene Zielherausforderungen – ein paar pro Einheit zu machen, baut nicht nur Ihre Fähigkeiten auf, sondern simuliert auch Spielsituationen auf dem Platz (z. B. das Anspielen eines Grüns). Der Home Tee Hero des Garmin R10 oder eine Simulatorrunde auf einem leichten Platz können ebenfalls großartig sein: Spielen Sie 9 Löcher virtuell und führen Sie eine Scorekarte. Das hilft, Training ins Spiel zu übertragen, und Sie lernen Dinge wie, wann Sie auf Nummer sicher gehen sollten oder wann Sie (virtuell) mit Ihren aktuellen Distanzen und Ihrem Konstanzniveau über diesen Teich schlagen können.
Übungen zum Ausprobieren
Beginnen Sie mit einer Wedge-Distanzleiter. Wählen Sie vier Distanzen: 40, 60, 80, 100 Yards. Schlagen Sie zu jeder (Ihr Monitor zeigt Ihnen die Carry-Distanz an) und versuchen Sie, ein Gefühl für jede Yardage zu entwickeln. Bauen Sie dieses Muskelgedächtnis auf, und Sie werden einen schnellen Anstieg der Konstanz auf dem Platz sehen.
Sie können auch einen Tempo-Test ausprobieren. Wählen Sie einen Schläger und ein Ziel. Schlagen Sie 10 Bälle mit einem ruhigen, ausgewogenen Einsatz von 80 %, dann 10 Bälle mit Ihrem „Full Send“, also einem Schwung mit voller Geschwindigkeit. Mit den Daten des Launch-Monitors können Sie die Streukreise und die Schwankungen in der Carry-Distanz zwischen den beiden Schwungsätzen vergleichen. Die meisten Golfer werden feststellen, dass die 80%-Gruppe enger zusammenliegt (auch wenn sie ein paar Yards kürzer ist). Diese Evidenz macht es leichter, sich auf ein kontrollierteres Tempo auf dem Platz festzulegen. Sie werden wahrscheinlich feststellen, dass weniger mehr ist und dass ein wenig vom Schwung wegzunehmen zu mehr Fairways und Greens und weniger Katastrophen führt!
Vermeiden Sie Informationsüberflutung
Ein häufiger Fehler von Anfängerinnen und Anfängern ist, sich von Daten überwältigen zu lassen. Du musst nicht verstehen jeder metrische Werte am ersten Tag. Konzentriere dich auf ein paar zentrale (Distanz, Ballgeschwindigkeit, vielleicht Schlägerpfad) und arbeite daran, diese nach und nach zu verbessern. Jage außerdem nicht bei jedem Schlag der Maximaldistanz hinterher. Es ist verlockend, eine persönliche Bestleistung bei der Ballgeschwindigkeit zu sehen und sie übertreffen zu wollen – aber das kann zu wilden Schwüngen führen und schlechte Gewohnheiten einschleifen. Behandle den Launch Monitor stattdessen wie einen Spiegel – er spiegelt wider, was du tust. Nimm kleine Anpassungen vor (Griff, Stand, Ausrichtung) und beobachte die Veränderungen, anstatt ständig härter zu schwingen. Konstanz schlägt gelegentliche Brillanz, wenn es darum geht, ein hohes Handicap zu senken.
Für Mid-Handicapper (Handicap ~10–19)
Identifizieren Sie Ihre Schwächen
Mid-Handicapper haben normalerweise ein solides Spiel, aber ein oder zwei Bereiche, in denen Schläge verloren gehen. Nutze dein Launch-Monitor, um diese Schwäche genau zu identifizieren und zu beheben. Wenn zum Beispiel Annäherungsschläge ein Problem sind, verbringe Zeit mit Eisen-Übung am Simulator. Schau dir deine Streuung beim 7er-Eisen, 8er-Eisen usw. an. Wenn du siehst, dass beim 7er-Eisen deine Schläge überall landen (einige links, einige rechts, ungleichmäßige Distanzen), ist das ein Hinweis darauf, an der Schlägerblattkontrolle oder der Trefferqualität zu arbeiten.
Sie können ein virtuelles Grün als Ziel festlegen und sich selbst herausfordern, zum Beispiel 7 von 10 Schlägen aus 150 yards darauf zu landen. Machen Sie das bei jeder Übungseinheit und verfolgen Sie Ihre Fortschritte über mehrere Wochen. Die Daten könnten zeigen, dass Ihr durchschnittlicher Fehlschlag kurz-rechts ist – dann wissen Sie, dass Sie dazu neigen, die Schlagfläche offen zu lassen und den Ball nicht ganz voll zu treffen. Das ist etwas Konkretes, das Sie angehen können – sei es ein technischer Fehler oder ein Hinweis darauf, dass Sie in solchen Situationen einen Schläger mehr nehmen sollten.
Stimme deine Distanzen ab
Auf diesem Niveau, Abstandskontrolle ist entscheidend. Du triffst vielleicht einige Grüns, aber bist du oft zu lang oder zu kurz? Nutze den Monitor, um deine Schlägerdistanzen wirklich exakt zu bestimmen. Erstelle deine eigenen Entfernungstabelle: schlage 10 Bälle mit jedem Schläger und notiere die durchschnittliche Carry-Distanz. Du könntest zum Beispiel feststellen, dass dein 8er-Eisen konstant 140 yards Carry hat, aber du Gedanke es waren 150. Mit echten Daten triffst du bessere Entscheidungen auf dem Platz (und plötzlich landen diese Annäherungsschläge auf dem Grün statt im vorderen Bunker). Viele Monitore speichern deine Schlaghistorie, sodass du diese Referenz im Laufe der Zeit aufbauen und dein Spiel noch besser verstehen kannst als zuvor.
Spiel den Ball (oder nicht)
Als Mid-Handicapper spielst du vielleicht mit dem Gedanken, bewusst Draws oder Fades zu schlagen. Ein Launch-Monitor ist dafür perfekt. Er bietet eine sichere Umgebung zum Experimentieren. Der Monitor zeigt dir die Spinachse jedes Schlages an und hilft dir, deinen Fade oder Draw zu entwickeln. Aber selbst wenn du nicht an der Schlagform arbeitest, hilft dir das Verständnis deines natürliche Schlagform und darauf zu spielen, ist entscheidend. Die Monitor-Daten über viele Schläge könnten zeigen: „Oh, ich schlage mit meinem Driver immer einen 10-Yard-Fade.“ Akzeptiere das und richte dich entsprechend aus! Nutze, was dir die Zahlen sagen, um kluge Entscheidungen zu treffen – es ist besser, eine Schlagform zu haben, auf die du dich verlassen kannst, als zwei, die du nicht kontrollieren kannst.
Drucksimulation
In dieser Phase ist deine Technik auf der Driving Range vielleicht solide, bricht aber unter Druck ein. Nutze deinen Simulator, um Drucksituationen nachzustellen. Warum nicht einen Nearest-to-the-Pin-Wettbewerb gegen einen Freund aufsetzen oder einfach versuchen, deinen eigenen Rekord zu schlagen? Oder spiele die letzten 3 Löcher eines Kurses mit der Vorgabe, Par zu spielen, und schau, wie du dich schlägst. Viele Launch-Monitore ermöglichen es, zu konkurrieren oder an Online-Events teilzunehmen. Diese Art von Training schult dich darin, mit Nervosität umzugehen und dich zu fokussieren – Fähigkeiten, die sich direkt in bessere Scores übertragen, wenn es in der Realität darauf ankommt. Es ist ein echter Selbstvertrauensschub, wenn du auf der 18 deinen Drive perfekt triffst und dein virtuelles Match gewinnst – ein Teil dieses Selbstbewusstseins begleitet dich auch auf den echten Platz.
Vernachlässige das kurze Spiel nicht
Nicht alle Launch-Monitore erfassen kurze Chips oder Putts gut. Dennoch können Sie Ihr Pitchen mit ihnen. Diese 30–70-Yard-Schläge sind Rundenkiller für Mid-Handicaper, wenn sie misslingen. Stell dein Gerät auf ein Ziel in diesem Bereich ein und übe diese Finesse-Schläge. Achte auf Abflugwinkel und Spin. Hoher Abflug mit genügend Spin landet weicher, im Gegensatz zu einem flachen Skidder, der zu weit laufen kann. Ein knackiger 50-Yard-Wedge, den du auf deinem Simulator feinjustiert hast, wird dir auf dem Platz unzählige Schläge ersparen.
Häufige Fehler, die Sie vermeiden sollten
Spieler mit mittlerem Handicap können sich schuldig machen, überkorrigierend. Bei all diesen Daten siehst du vielleicht ein paar schlechte Schläge und fummelst gleichzeitig zu viel an deinem Schwung herum. Vermeide es, mehrere Variablen gleichzeitig zu ändern, denn wenn es funktioniert, weißt du nicht, welche Änderung geholfen hat, und wenn es schlechter wird, könntest du ein Element deines Schwungs zurücknehmen, das eigentlich in Ordnung war. Nimm jeweils nur eine Anpassung vor und beobachte die Wirkung in den Daten.
Für Low-Handicapper und angehende Scratch-Spieler
Wenn du bereits ein versierter Spieler bist, geht es auf dem Weg zur Verbesserung eher um kleine Unterschiede und Konstanz unter Druck. Auf diesem Niveau werden Launch-Monitore zu Präzisionswerkzeugen, um dein Spiel zu verfeinern.
Optimiere deinen Ballflug
Spieler mit niedrigem Handicap sollten einen Launch-Monitor verwenden, um sicherzustellen, dass ihre Werte für wichtige Statistiken – relativ zu ihrer Schwunggeschwindigkeit – in „tourähnlichen“ Bereichen liegen. Überprüfen Sie zum Beispiel Ihre Abschlagwinkel und Spin-Rate des DriversViele Amateure treffen den Driver zu flach mit zu viel Spin und verlieren dadurch Länge. Wenn dein Gerät anzeigt, dass du mit 7° und 3500 rpm abschlägst, ist es möglicherweise Zeit, Setup oder Equipment anzupassen (probier zum Beispiel eine andere Tee-Höhe, leg den Ball weiter nach vorn oder zieh einen anderen Schaft in Betracht), um näher an etwa 12° Launch und 2200 rpm zu kommen – ein Rezept für maximale Distanz. Der Monitor ist hier unverzichtbar; du kannst Experimente durchführen und die Ergebnisse sofort sehen. Ähnlich bei den Eisen: Schau dir Eintreffwinkel und Spin an, um einzuschätzen, ob deine Annäherungsschläge auf dem Grün halten. Zu wenig Spin oder ein zu flacher Eintreffwinkel – und du weißt, warum dir die 5er-Eisen davonlaufen.
Schlagformen verfeinern und „Go-to“-Schläge
Bei einem niedrigen Handicap solltest du dir ein paar Standardschläge aneignen – vielleicht ein gewaltiger Drive vom Tee oder bei Bedarf ein Fade mit dem 6er-Eisen. Nutze den Simulator, um diese Spezialschläge zu üben. Du willst einen verlässlichen Punch Shot gegen den Wind? Probiere verschiedene Ballpositionen und Schwunglängen aus, während du auf dem Monitor den Abflugwinkel beobachtest. Du siehst sofort, welche Flugbahn du bekommst. Arbeite an einem sanften Fade-Annäherungsschlag – der Monitor zeigt dir, ob du tatsächlich ein paar Yards wegnimmst und Spin hinzufügst für einen kontrollierten Flug. Wenn du diese Schläge am Launch Monitor einstudierst, wirst du ihnen auf dem Platz vertrauen, weil du messbare Belege dafür hast, wie sie performen.
Mentale Stärke und Beständigkeit
Eine großartige Nutzung von Simulatoren für gute Spieler ist das Üben von Szenarien. Zum Beispiel können Sie die letzten 4 Löcher eines Meisterschaftsplatzes simulieren, bei denen Sie eine Führung verteidigen oder aufholen müssen. Sie können auch einstellen schwierige Bedingungen für das Training – wie starker Wind auf einem Linksplatz – und sehen Sie, wie Sie Ihren Ballflug steuern.
Mit der Zeit macht dich diese Art von Übung zu einem denkender Spieler die sich an den Kurs anpassen können. Du gehst in echte Runden, nachdem du in virtuellen schon „alles gesehen“ hast – verschiedene Lügen, unterschiedliche Strategien und wechselnde Bedingungen. Wenn dich nichts mehr überrascht, womit du konfrontiert wirst, erreichst du ein neues Leistungsniveau.
Falle, die es zu vermeiden gilt: Lähmung durch übermäßige Analyse
Single-Handicapper können in die Falle tappen, den perfekten Zahlen hinterherzujagen und dabei zu vergessen, einfach Golf zu spielen. Denke daran: Das Ziel ist, niedrigere Scores zu schießen, nicht TrackMan-perfekte Schwünge zu haben. Nutze die Daten, um deine Leistung auf dem Platz zu unterstützen, nicht als Selbstzweck. Wenn dein Launch Monitor sagt, dass dein 6er-Eisen 6000 rpm Spin hat und du Grüns triffst und gut scorst, musst du nicht zwingend herumbasteln, um 7000 rpm wie ein Tourpro zu erreichen. Gut ist gut genug, wenn es zuverlässig Ergebnisse liefert. Anders ausgedrückt, Repariere nicht, was nicht kaputt ist nur weil die Zahlen nicht auf Tour-Niveau sind. Konzentriere dich auf Bereiche, in denen die Daten echte Probleme oder Unstimmigkeiten zeigen, die deine Ergebnisse beeinflussen. Dann senkst du dein Handicap.
Mit einem Launch Monitor Ihre Handicap-Ziele erreichen
Dein Golf-Handicap spiegelt deine Golfreise wider – und mit dem richtigen Ansatz, den passenden Tools und der richtigen Einstellung ist es eine Zahl, die du verbessern kannst.
Inzwischen sollte klar sein, dass ein Launch-Monitor zwar nicht für dich den Schläger schwingt, dich aber mit Wissen ausstattet – mit einer Art von Wissen, die früher Tour-Profis mit Teams von Coaches und Analysten vorbehalten war. Er bietet dir außerdem Raum zum Experimentieren, hilft dir, dich auf deine Schwächen zu konzentrieren und deine Stärken zu verstärken.
Ganz gleich, ob Sie sich für den All-in-One-Komfort von Garmins Approach R50, die tiefgehenden Einblicke von Rapsodo MLM2PRO, oder die professionelle Präzision von Uneekor Eye Mini Lite, jedes kann in der Praxis ein bahnbrechender Partner sein. Diese Geräte helfen Ihnen, intelligenter zu üben, nicht nur härter.
Alles, worüber wir gesprochen haben – vom Verständnis von Handicaps bis hin zum optimalen Einsatz von Launch-Monitoren – ist ein Mittel zum Zweck. Also, nimm die Reise an. Setze dir ein paar Ziele. Investiere, wenn möglich, in ein bisschen Technologie, um den Prozess zu beschleunigen. Dann geh raus (oder in deine Garage/deinen Keller) und fang an zu experimentieren, zu lernen und dich zu verbessern.
Mit jeder Trainingseinheit kommst du dem Golfspieler, der du sein möchtest, einen Schritt näher!